How to let your staff sign in to GeoCivix with their existing Microsoft credentials instead of a separate GeoCivix password.
- How it works
- Set up the application in Entra
- Configure GeoCivix
- Turn on SSO for each person
- Test it
Microsoft renamed Azure Active Directory to Microsoft Entra ID in 2023, and moved it to its own admin center. If you are looking for the Azure AD instructions, this is the right page.
In short Users always start at the GeoCivix sign-in page, never from the Microsoft My Apps tile. |
01 | How it works |
GeoCivix is a SAML 2.0 service provider. The user enters their email address on the GeoCivix sign-in page. If their subscription is set to SAML, GeoCivix builds a signed authentication request and sends the browser to Entra. Entra authenticates the person and posts the response back to GeoCivix, which matches the email in that response to the contact on record and signs them in.
02 | Set up the application in Entra |
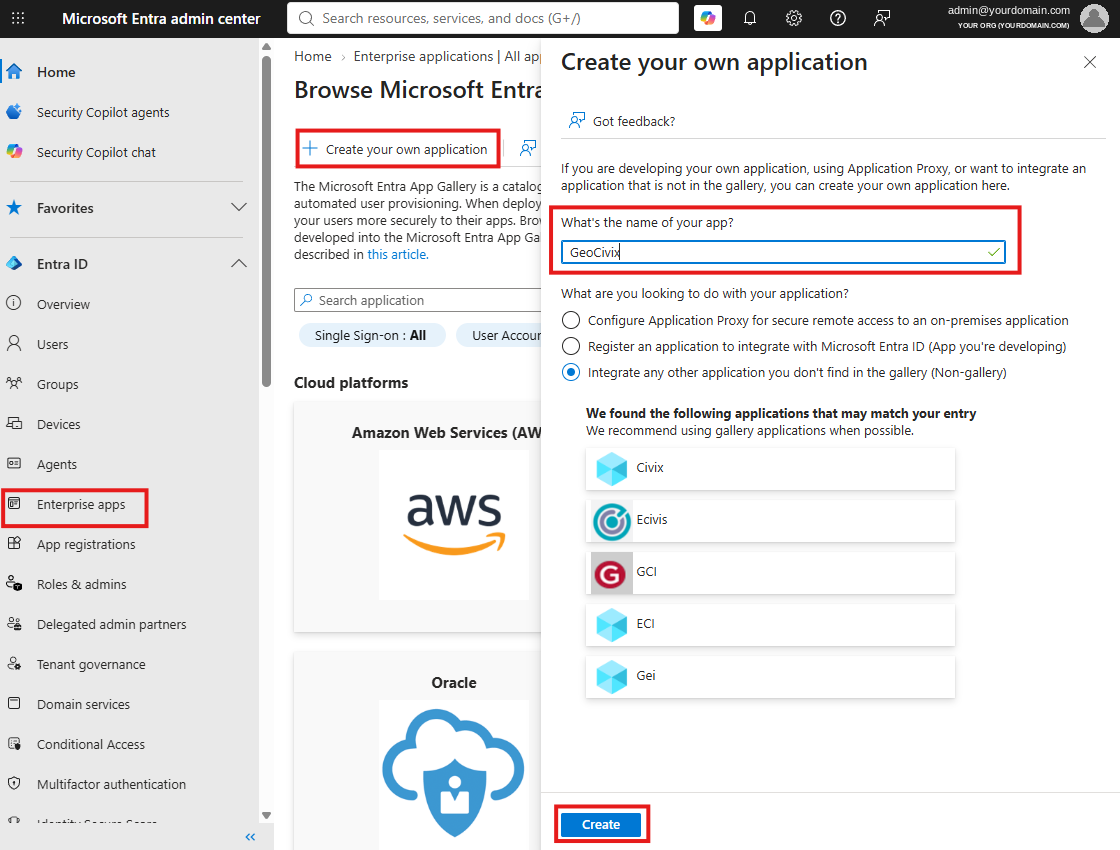
1 | In the Microsoft Entra admin center, go to Enterprise apps, then New application, then Create your own application. |
2 | Choose Integrate any other application you don't find in the gallery (Non-gallery), name it GeoCivix, and select Create. |
3 | Open the application and go to Single sign-on, then choose SAML. |
4 | In Basic SAML Configuration, set these two values, replacing <portal> with your own portal address: |
Or skip the typing. GeoCivix publishes signed service provider metadata at https://<portal>.geocivix.com/sso/saml/metadata/. Use Upload metadata file and both values are filled in for you.
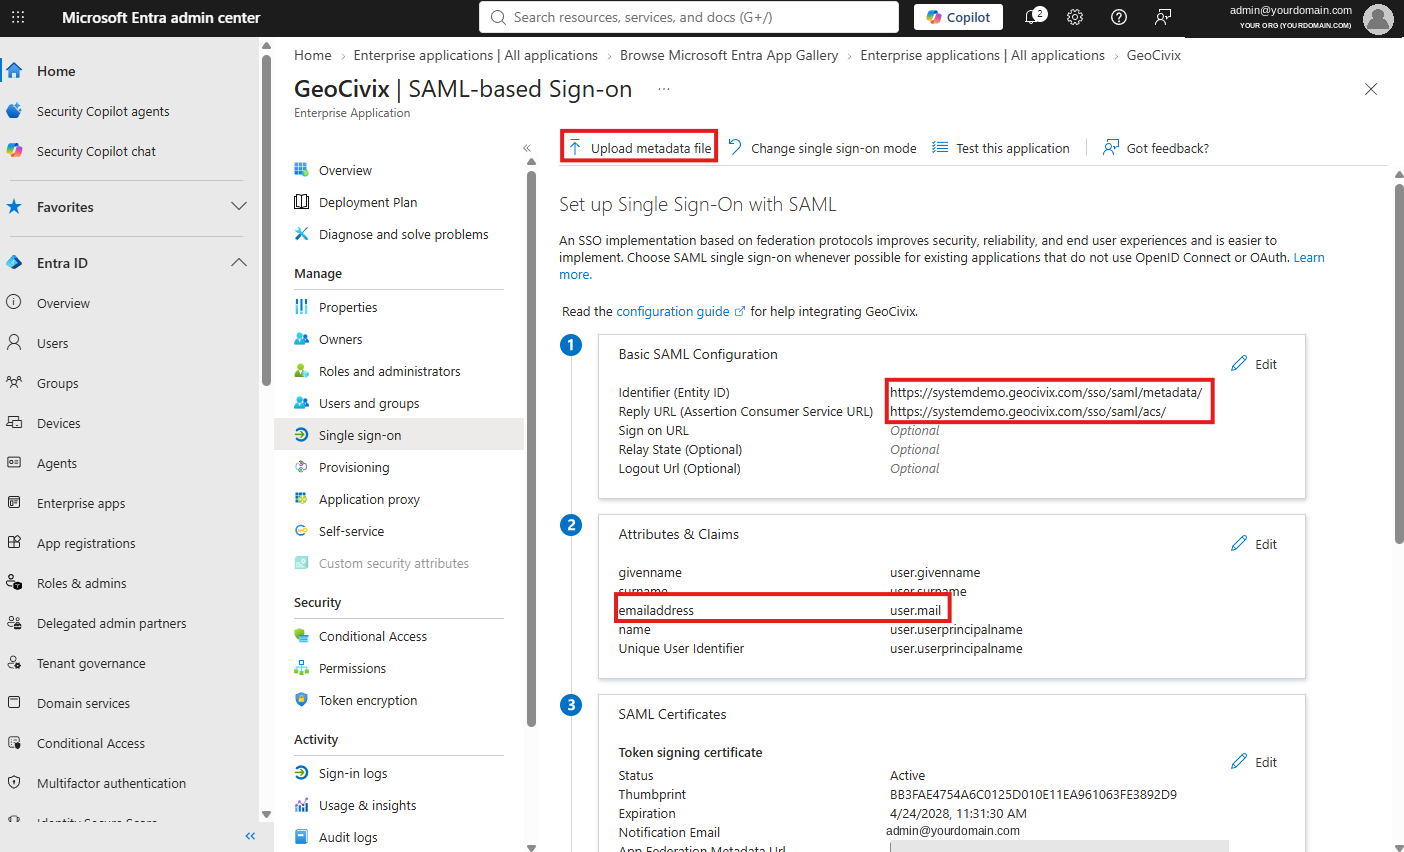
5 | Leave Attributes and Claims alone. The Entra defaults are already correct: GeoCivix reads the email address claim, which Entra maps to the user's mail attribute by default. Leave the NameID default alone too. |
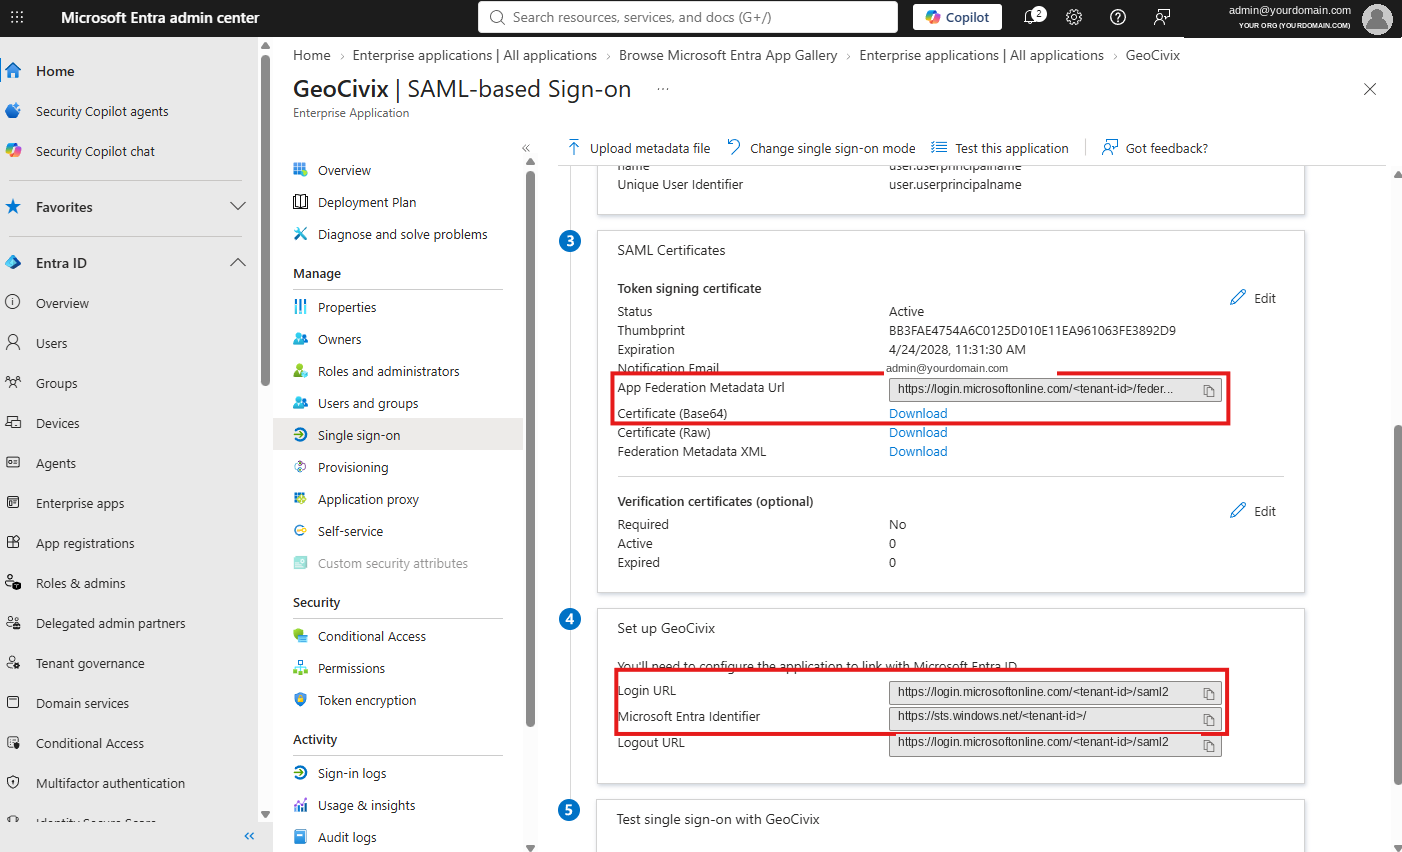
6 | From SAML Certificates and Set up GeoCivix, collect four things for the next section: |
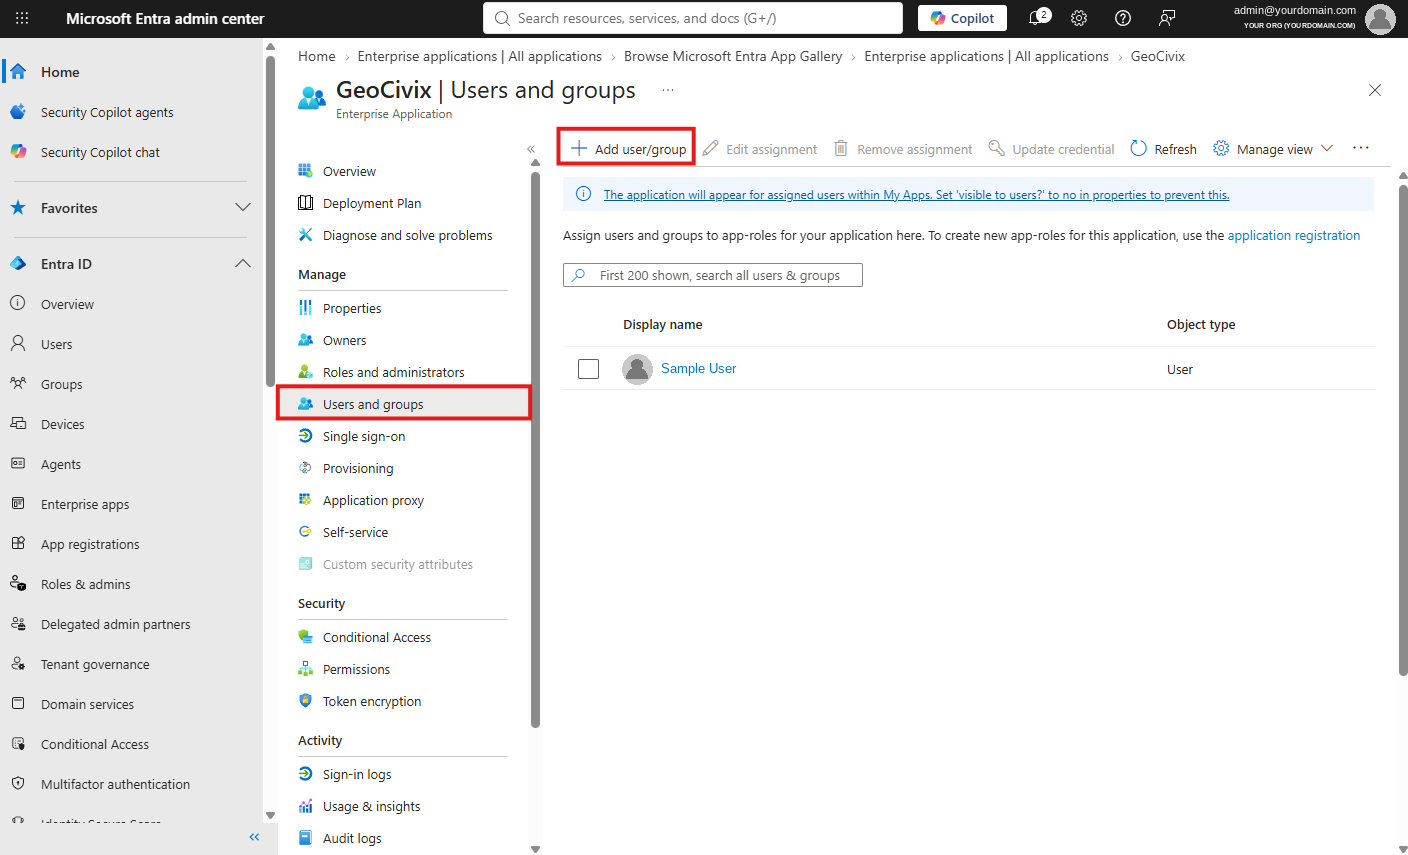
7 | Under Users and groups, assign the people or groups who will sign in this way. |
You do not need to upload a verification certificate. GeoCivix signs its requests, but Entra ignores request signatures unless you add one, so there is nothing to do here.
03 | Configure GeoCivix |
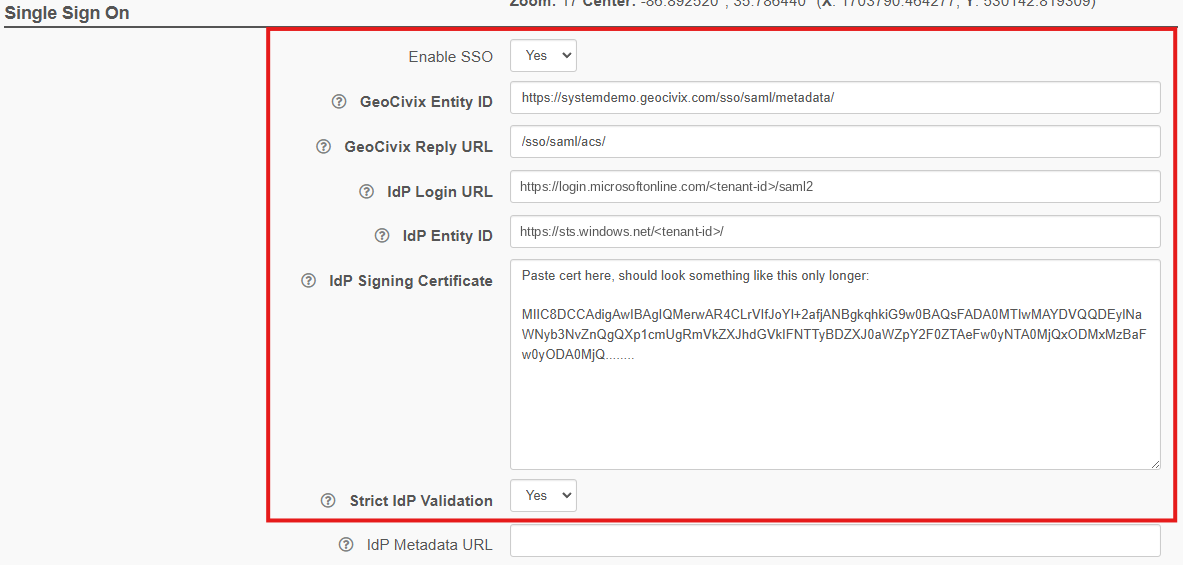
Sign in to GeoCivix as a site administrator, select Site > Site Configuration, and expand the Site Configuration section. In the Single Sign On block, set the following.
The metadata URL is optional, and worth filling in anyway. A scheduled job reads it and re-pins the certificate automatically when Microsoft rotates it, so sign-in keeps working through a certificate rollover with nobody having to do anything. Leave it blank and someone has to notice and paste a new certificate before the old one expires.
04 | Turn on SSO for each person |
Single sign-on is set per subscription, not for the whole portal, so you can have some people signing in with Microsoft and others with a password.
- Check that the person's GeoCivix contact email matches their Entra email. The comparison ignores capitals but is otherwise exact.
- Select Site > Users and search for them, then select their name in the results.
- Expand Subscriptions and select their subscription to your portal.
- Change Login Method to SAML and submit.
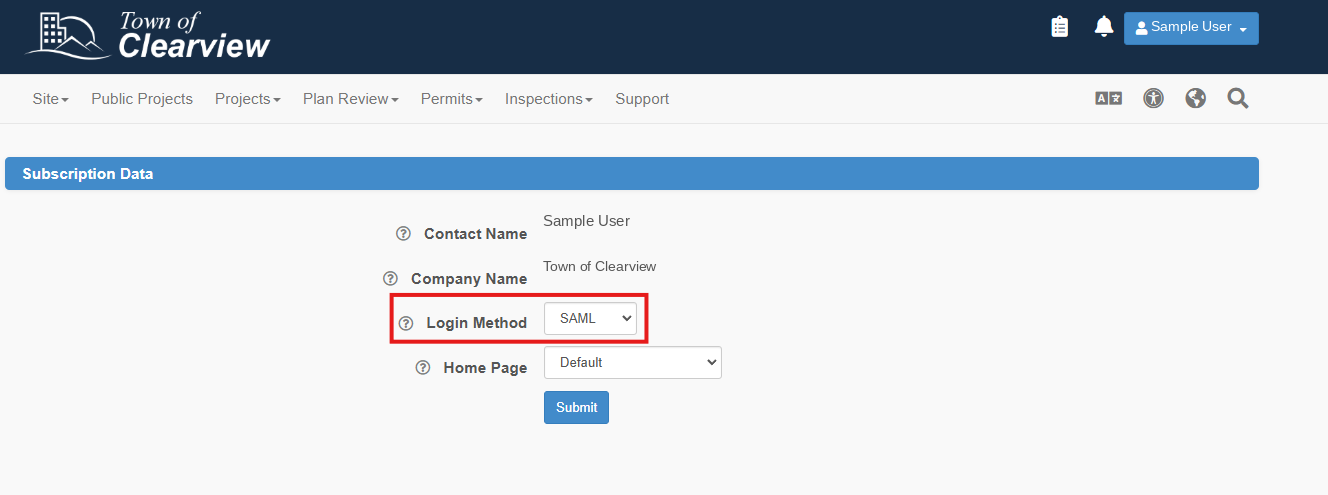
The default is Website, which means a password.
05 | Test it |
- Go to your portal and select Sign In. Sign out first if you are already signed in.
- Enter the email address of somebody you have set to SAML.
- You are sent to Microsoft to authenticate. If you are already signed in to Microsoft you may pass straight through.
- You are returned to your portal, signed in.
If it does not work, contact GeoCivix support.
Was this article helpful?
That’s Great!
Thank you for your feedback
Sorry! We couldn't be helpful
Thank you for your feedback
Feedback sent
We appreciate your effort and will try to fix the article